

creating light spiralsooh, shinyLooking from graphic website to graphic website, one can assume that the light spiral technique has indeed caught on. In this tutorial, we will be using Photoshop's lens flare technique in order to achieve this spiral effect. In the end, your product will be similar to my own: 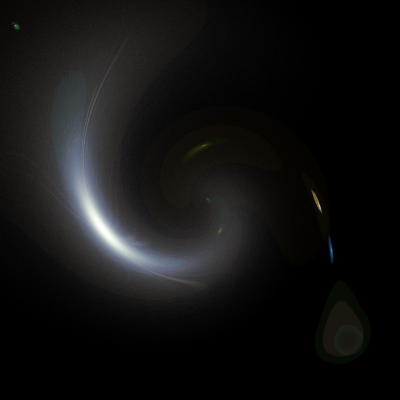 To begin, start with a canvas of any size. There is no limitation to the size, therefore you can choose whatever suits you best. I myself have decided on a 400 by 400 sized canvas. Your canvas must be filled with a colour before you can utilize the lens flare. I suggest black and will be using it in on my canvas. Now that your canvas is prepped, you can create the light the will eventually be your spiral. Find within the main toolbar containing such things as, "File, Edit, Image, etc," the Filter tab and scroll down to Render. Once you click this, you will be given a few options. Choose Lens Flare. Once the window appears, you can choose the placement of your lens flare, the size (presented as brightness), and the type of lens. For this particular tutorial, I have picked the 105mm Prime because in my opinion, it produces the best result. I prefer to position the flare near the top left corner, but not directly within it. Once your lens flare exists on your canvas, return to the Filter tab and, this time, scroll to Distort. A numerous amount of options will greet you, choose Twirl. Again a window will appear. This window allows you to choose the angle of the twirl. I have set mine to -246. You can play with this option for varying results. Once twirled, the desired product is completed. If there are any questions or concerns you have, feel free to e-mail me at moonflamedesigns@gmail.com. Thank you for reading~. |